

Inbound transfers in Mexico
Complete the transfers setup guide first. Then follow these steps to receive inbound transfers:- Use your secret key to create an
account_number. This account number is a standardized Mexican bank account number (CLABE) used on the Sistema de Pagos Electrónicos Interbancarios (SPEI) rail. - Create a webhook endpoint to handle inbound transfer events.
- Receive a transfer at the account number and handle the webhook notification.
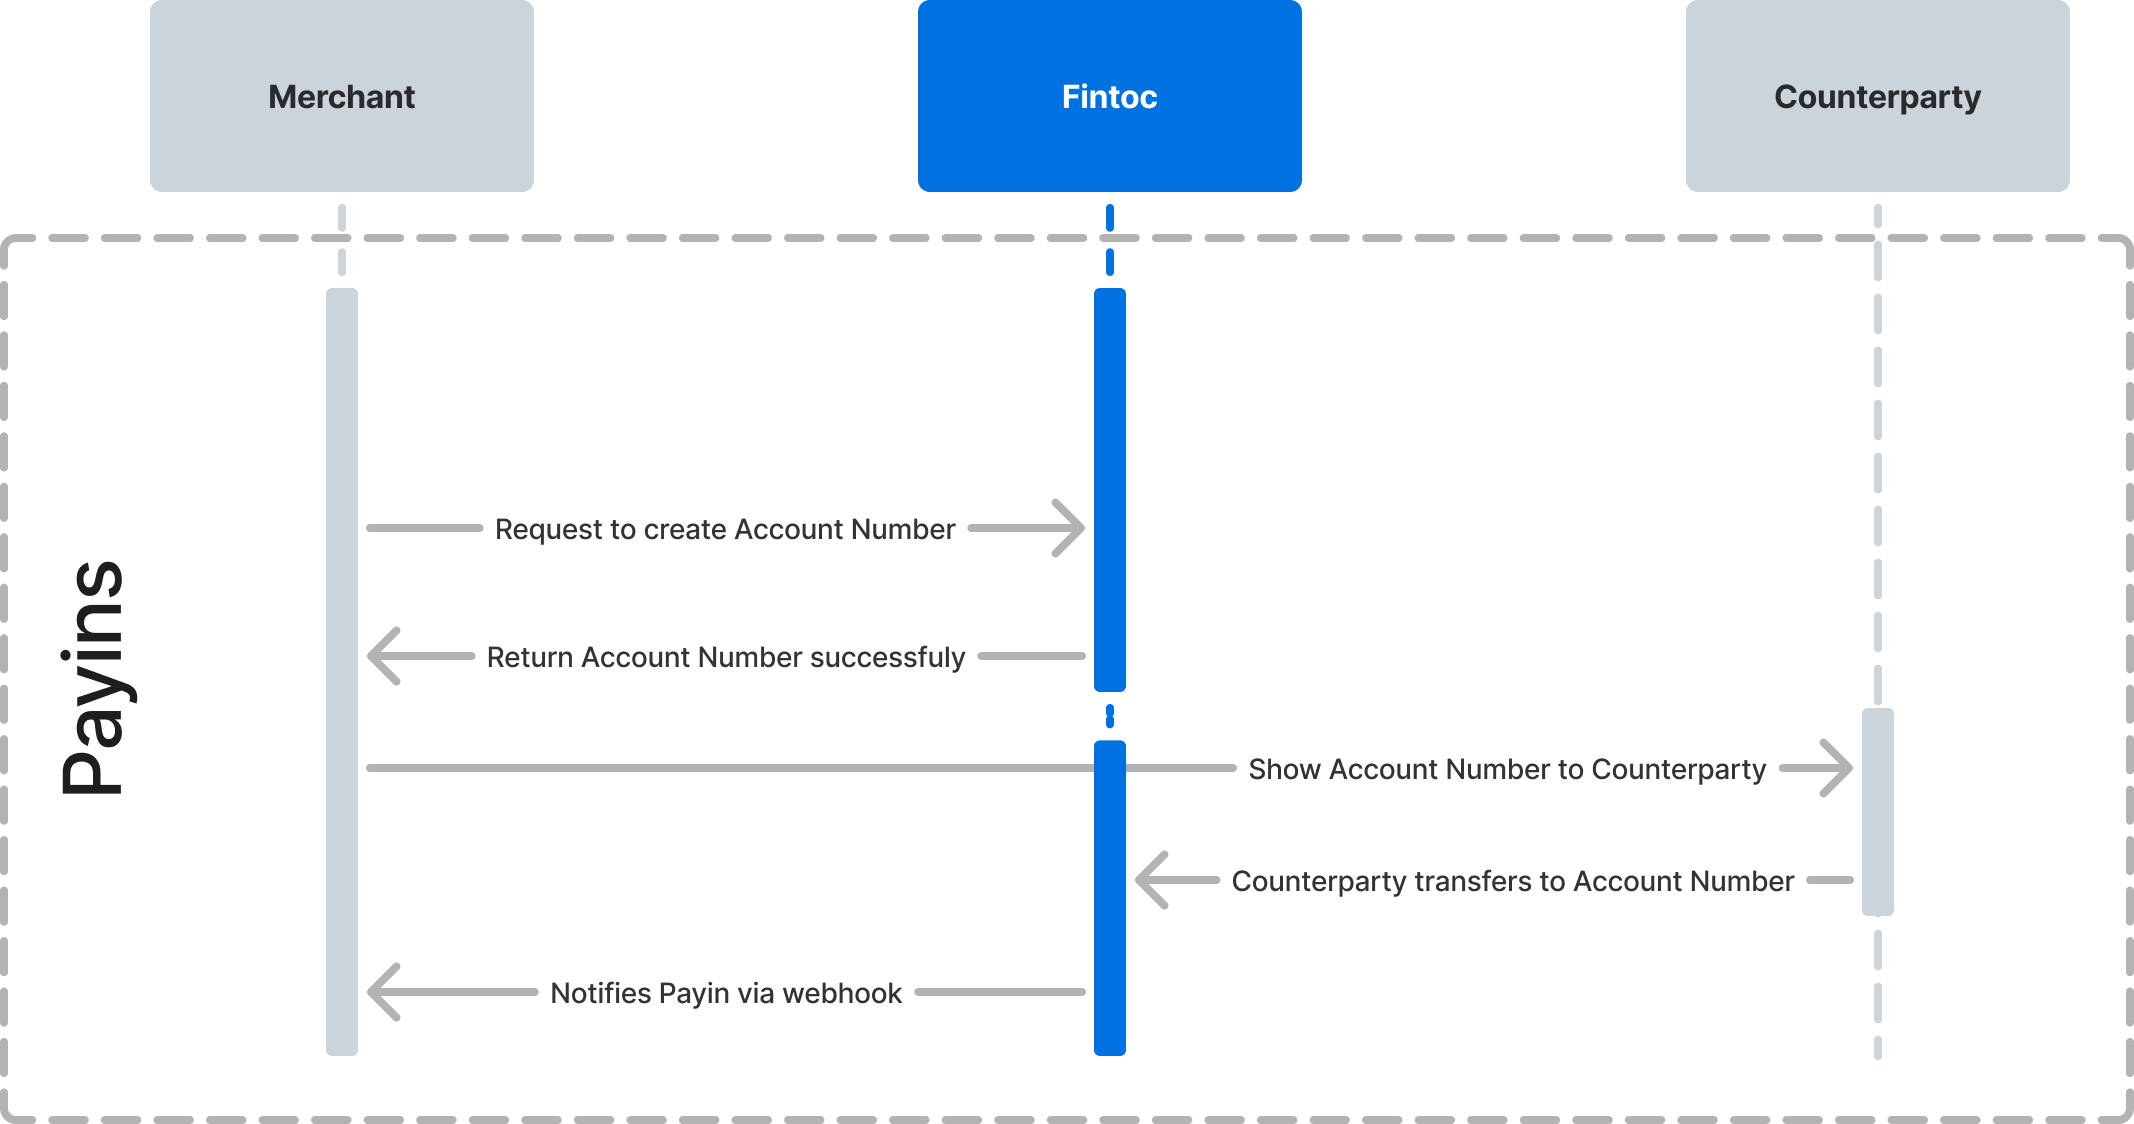
Step 1: Create an account number (CLABE)
AnAccountNumber represents a CLABE. Assign the account number to a customer or order to reconcile your incoming payments. Assign one account number per customer. A transfer to that account number then identifies the customer who sent the transfer. To learn more, see the account number data model.
Attach arbitrary key-value data to your account number
When you create an account number, attach arbitrary key-value data to themetadata object. Use metadata to store a unique identifier, such as your internal customer ID. Fintoc includes the metadata object with each inbound transfer so you can reconcile the transfer against your internal records.
Example
Using your test secret key and your account ID, create anAccountNumber from your backend, attaching an internal customer ID id_cliente:
Node
Python
Step 2: Create a webhook endpoint to handle inbound transfer events
Fintoc sends atransfer.inbound.succeeded event whenever you receive an inbound transfer. Follow the webhook guide to create an endpoint that receives these events and runs actions.
The transfer.inbound.succeeded event looks like this:
Step 3: Receive a transfer at the account number
After you create an account number and add a webhook endpoint, you can receive transfers and reconcile your payments.Test the integration
Intest mode, use the /v2/simulate/receive_transfer endpoint to simulate an inbound transfer. The simulated transfer behaves like a real transfer sent to the same account number. Pass your test secret key and the account_number_id you created. Also pass an amount in the smallest currency unit and an uppercase ISO 4217 currency code:
Node
Python
Response
transfer.inbound.succeeded event to your webhook endpoint. The event contains the payload shown in Step 2. Receiving the transfer.inbound.succeeded event confirms your integration is working. For the full set of test values, see Test your integration.
Inbound transfers in Chile
Complete the transfers setup guide first. Then follow these steps to receive inbound transfers:- Identify your account and its
root_account_number, which receives the transfer. See the account data model to learn how Fintoc provisions this account number. - Create a webhook endpoint to handle inbound transfer events.
- Receive a transfer at your account and handle the webhook notification.
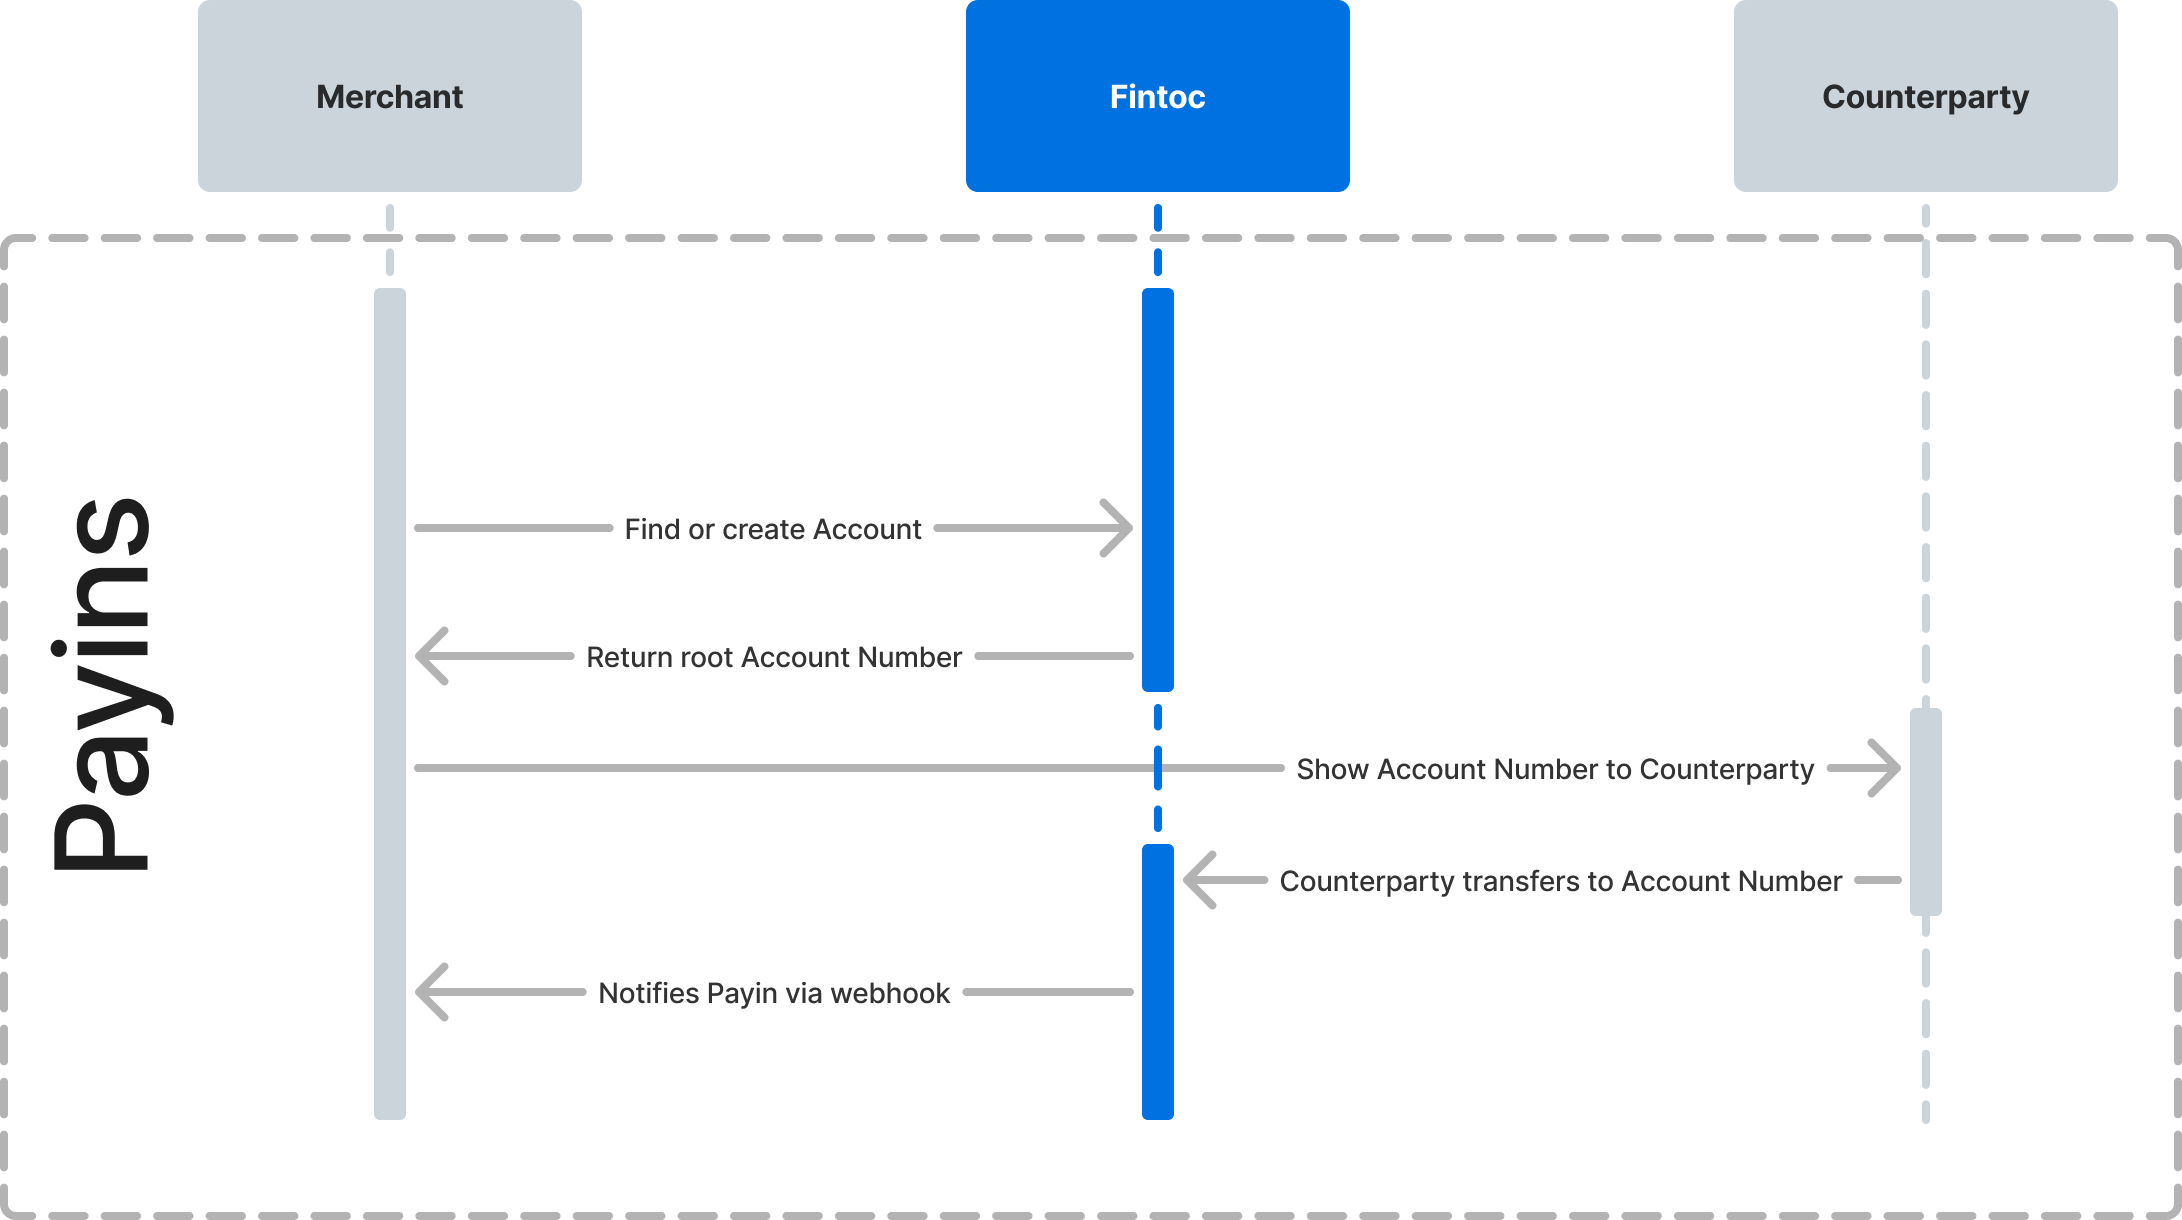
Step 1: Identify your account
Each Chilean account has aroot_account_number that receives inbound transfers. This value appears as account_number in the transfer.inbound.succeeded payload below. See the account data model to learn how Fintoc provisions this account number.
Step 2: Create a webhook endpoint to handle inbound transfer events
Fintoc sends atransfer.inbound.succeeded event whenever you receive an inbound transfer. Follow the webhook guide to create an endpoint that receives these events and runs actions.
The transfer.inbound.succeeded event looks like this:
Step 3: Receive a transfer at your account
After you identify your account and itsroot_account_number and add a webhook endpoint, you can receive transfers and reconcile your payments.
Test the integration
Intest mode, use the /v2/simulate/receive_transfer endpoint to simulate an inbound transfer. The simulated transfer behaves like a real transfer sent to the same account number. Pass your test secret key and your account’s account_number_id. Also pass an amount in the smallest currency unit and an uppercase ISO 4217 currency code:
Node
Python
Response
transfer.inbound.succeeded event to your webhook endpoint. The event contains the payload shown in Step 2. Receiving the transfer.inbound.succeeded event confirms your integration is working. For the full set of test values, see Test your integration.