

- Configure JSON Web Signature (JWS) signing keys and generate a JWS signature.
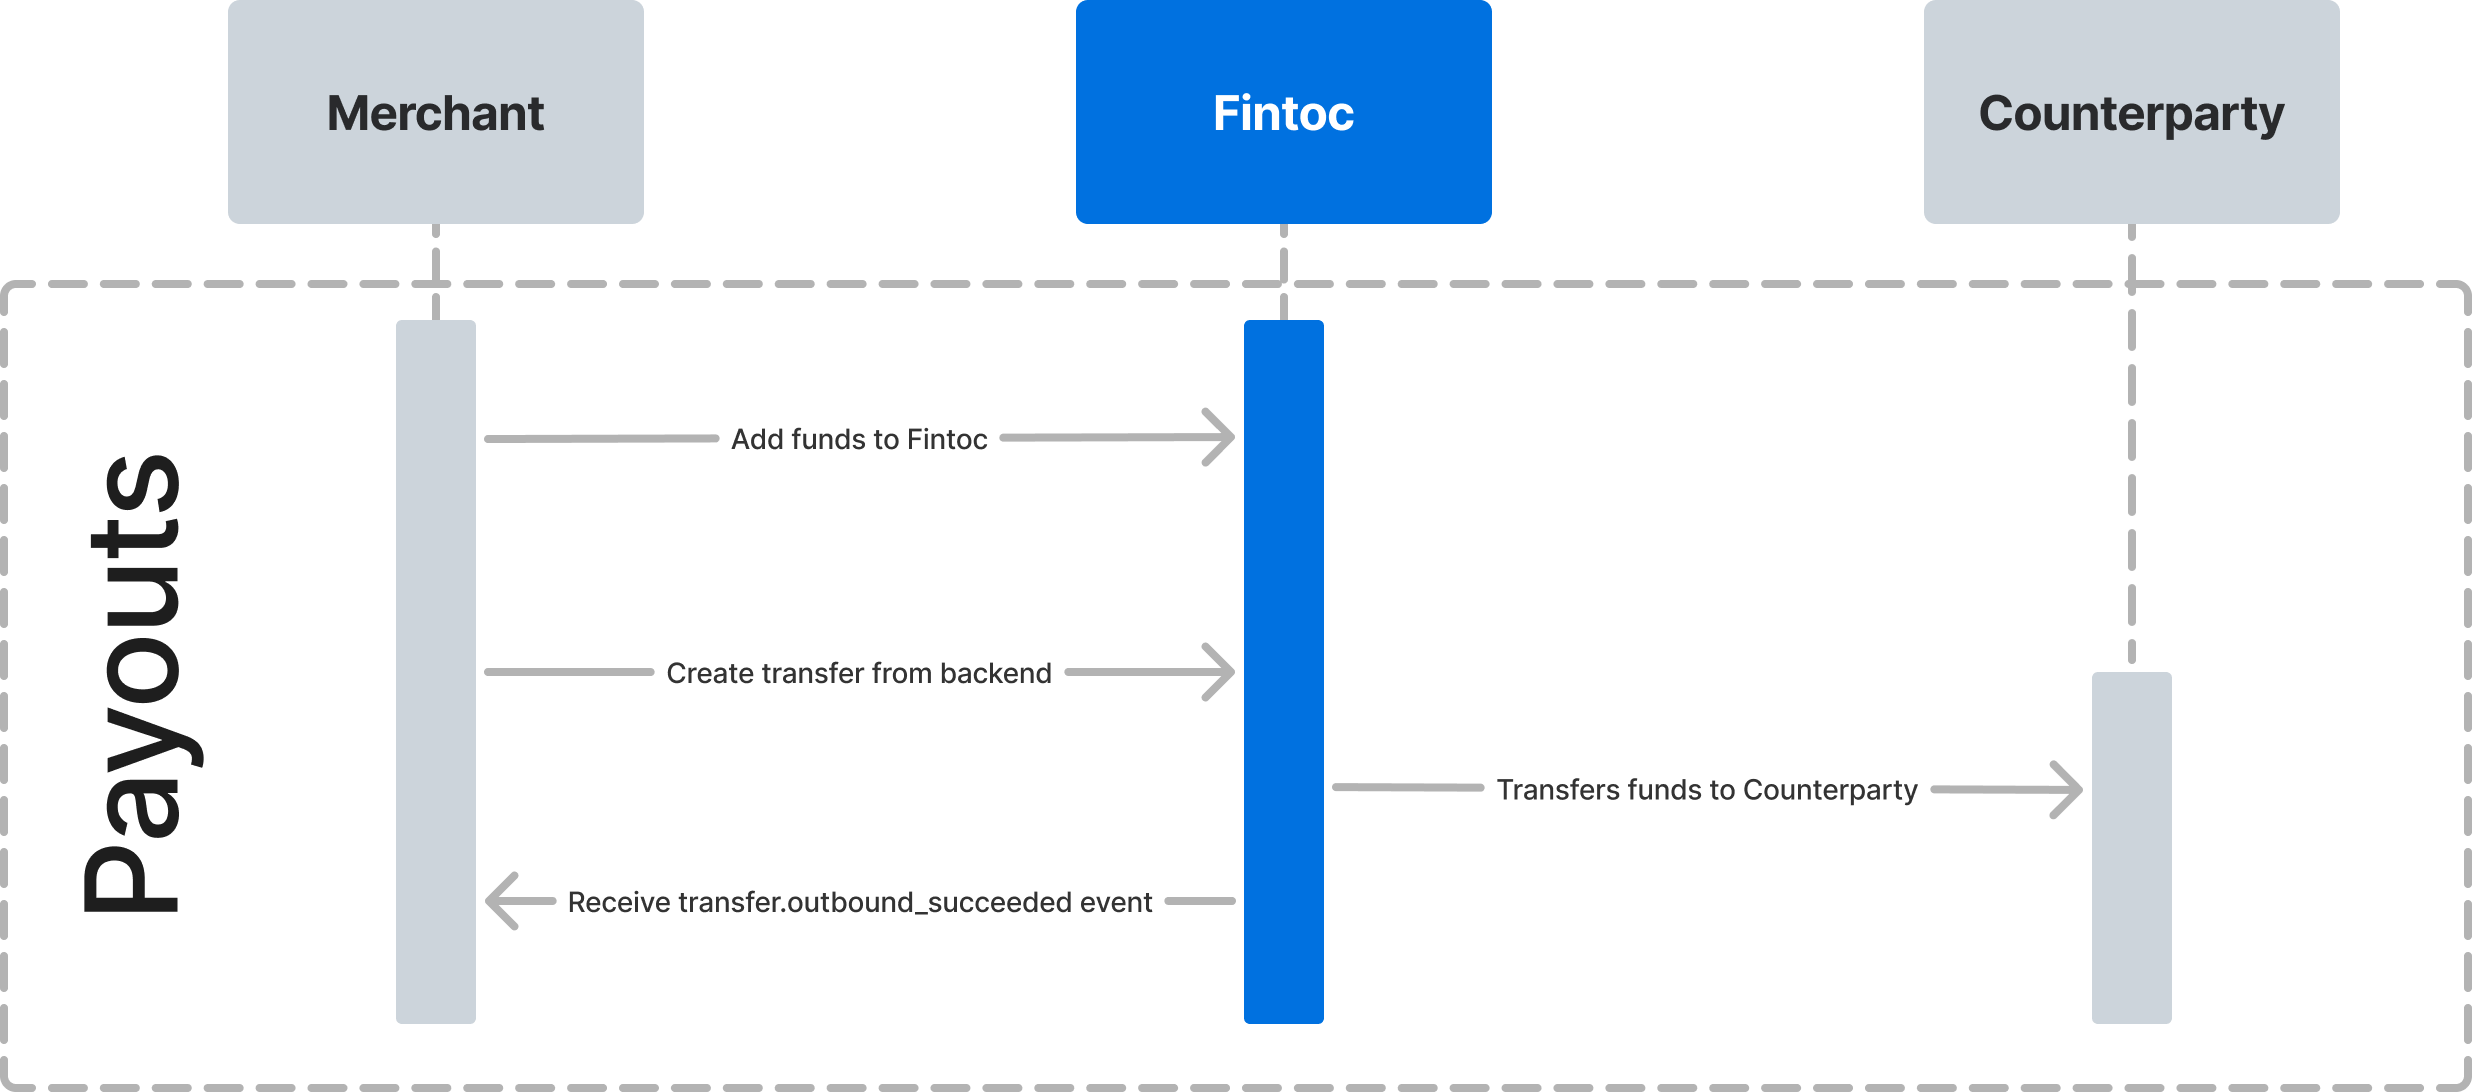
- Add funds to the account’s
root_account_number. - From your backend, create a transfer using your Secret Key and a JWS signature.
- Monitor transfer status.
Step 1: Configure JWS signing keys and generate a JWS signature
Every request to the Fintoc Transfers endpoints requires a JWS signature. JWS is a standard mechanism used to digitally sign a piece of data to ensure its integrity and authenticity. To learn how to sign an API call, follow the steps in the JWS Signature guide.Step 2: Add funds to Fintoc
To create transfers, fund yourAccount first by adding funds to the root_account_number. The deposit appears as an inbound transfer.
Step 3: Create a transfer
After you add funds to your account, create a transfer from your backend. Include your test Secret Key, JWS signature, origin account, amount, currency, and counterparty. The examples below show successful transfer responses. To test unsuccessful results, use the terminal-status table in the Test the integration section below.Use an idempotency key
Fintoc supports idempotency to safely retry transfers without creating a duplicate transfer. When creating a transfer, use an idempotency key. If a connection error occurs, repeat the request safely. To perform an idempotent request, provide anIdempotency-Key header to the request. Learn more about idempotent request in this guide.
Create a transfer for Mexico 🇲🇽
Here is an example that creates a transfer of 590.13 is the integer59013.
curl
Node
Python
Remember to add the institution IDWhen transferring to a standardized Mexican bank account number (CLABE), no counterparty institution ID is necessary. Fintoc deduces the institution from the CLABE number. If your counterparty is a mobile phone number or debit card, include the institution ID as a 5-digit number, as shown here. Otherwise, you get a
400 Bad Request error.Counterparty object requires one attribute:
Create a transfer for Chile 🇨🇱
Here is an example that creates a transfer of $1,869 CLP. Because CLP has no minor unit, theamount field is the same integer, 1869.
curl
Node
Python
Counterparty object requires five attributes:
Step 4: Monitor transfer status
Transfer status flow
A transfer’s status is one ofpending, succeeded, failed, returned, return_pending, or rejected. For more details on transfer statuses, see the Transfers data model.
Monitor status using webhooks
Fintoc sends atransfer.outbound.succeeded event when the transfer settles. Use the webhook guide to receive these events and run actions, such as sending a notification email to your customer or logging the transfer in your ERP.
We recommend handling the following events:
Webhooks may arrive in disorderFor example: a
transfer.outbound.rejected webhook event could arrive before the same transfer’s transfer.outbound.succeeded webhook, even though the transfer first succeeded and then was rejected.Test the integration
Use your test Secret Key (sk_test_...) to run transfers in test mode without moving real money. Every response includes "mode": "test".
In test mode, a transfer reaches the same terminal statuses as in production. The outcome is not forced by a predefined input. It depends on how the receiving party resolves the transfer. Use the three terminal statuses to confirm your webhook handling: