

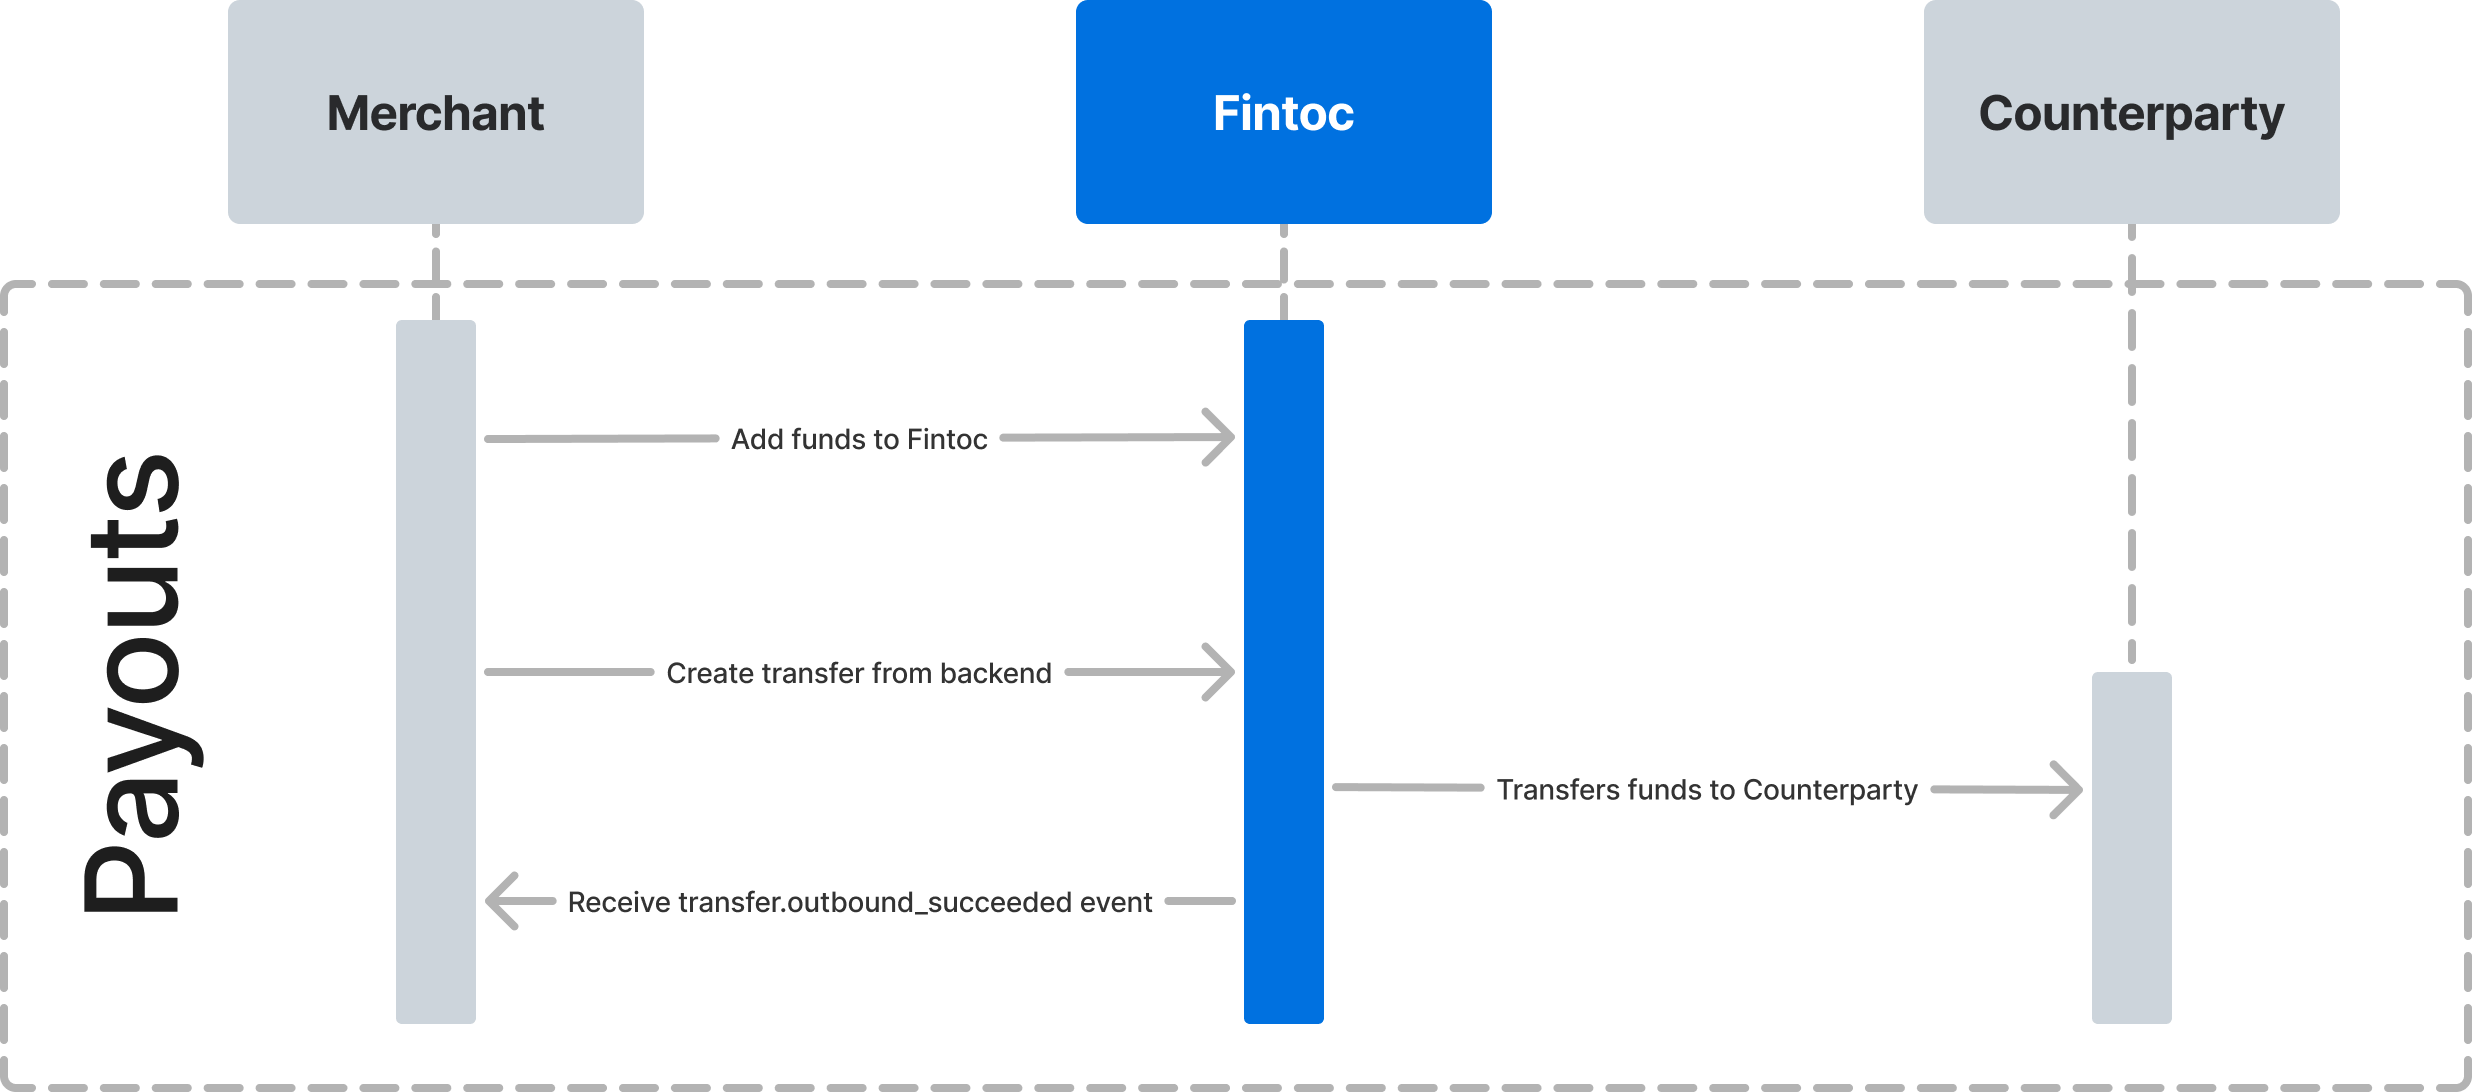
- Configure JSON Web Signature (JWS) signing keys and generate a JWS signature.
- Add funds to the
Accountobject’sroot_account_number. - Create a
Transferfrom your backend using your Secret Key and a JWS Signature. - Monitor the transfer status.
Step 1: Configure JWS signing keys and generate a JWS signature
Requests to the Transfers endpoints require a JWS. A JWS digitally signs data to verify its integrity and authenticity. To learn how to sign an API call, follow the steps in the JWS Signature guide.Step 2: Add funds to Fintoc
To create aTransfer, first add funds to your Account object’s root_account_number. The funds appear as an inbound transfer.
Step 3: Create a transfer
You can send real-time transfers after you fund your account. From your backend, create aTransfer using your test Secret Key and JWS Signature. Include the origin account, amount, currency, and counterparty receiving the payment.
The examples below show successful Transfer responses. Use the predefined inputs in Test your integration to test unsuccessful results.
Use an idempotency key
Fintoc supports idempotency so you can retry aTransfer request without performing the operation twice. Use an idempotency key when creating a Transfer. If a connection error occurs, retry the request with the same key to avoid creating a second Transfer.
To make an idempotent request, include the Idempotency-Key header.
Create a transfer for Mexico 🇲🇽
The following example creates aTransfer for MXN $590.13:
Use an SDK
Use the Python or Node SDK to create the transfer:Node
Counterparty object requires the following attribute:
A successful request returns the following response:
Create a transfer for Chile 🇨🇱
The following example creates aTransfer for CLP $1869:
Use an SDK
Use the Python or Node SDK to create the transfer:Node
In Chile, the
Counterparty object requires the following five attributes:
A successful request returns the following response:
Step 4: Monitor the transfer status
Transfer status flow
A transfer has one of the following statuses:pending, succeeded, failed, returned, return_pending, or rejected. For details about each status, see the Transfers data model.
Monitor status using webhooks
Fintoc sends atransfer.outbound.succeeded event when the transfer settles. Use the webhook guide to receive these events. You can then notify your customer or log the transfer in your enterprise resource planning (ERP) system.
We recommend handling the following events:
Webhooks may arrive out of orderFor example, a
transfer.outbound.rejected event can arrive before the same transfer’s transfer.outbound.succeeded event. The transfer can succeed before the rejection occurs.