

- Configure JSON Web Signature (JWS) signing keys and generate a JWS signature.
- Add funds to the account’s
root_account_number. - Create a transfer from your backend using your secret key and a JWS signature.
- Monitor transfer status.
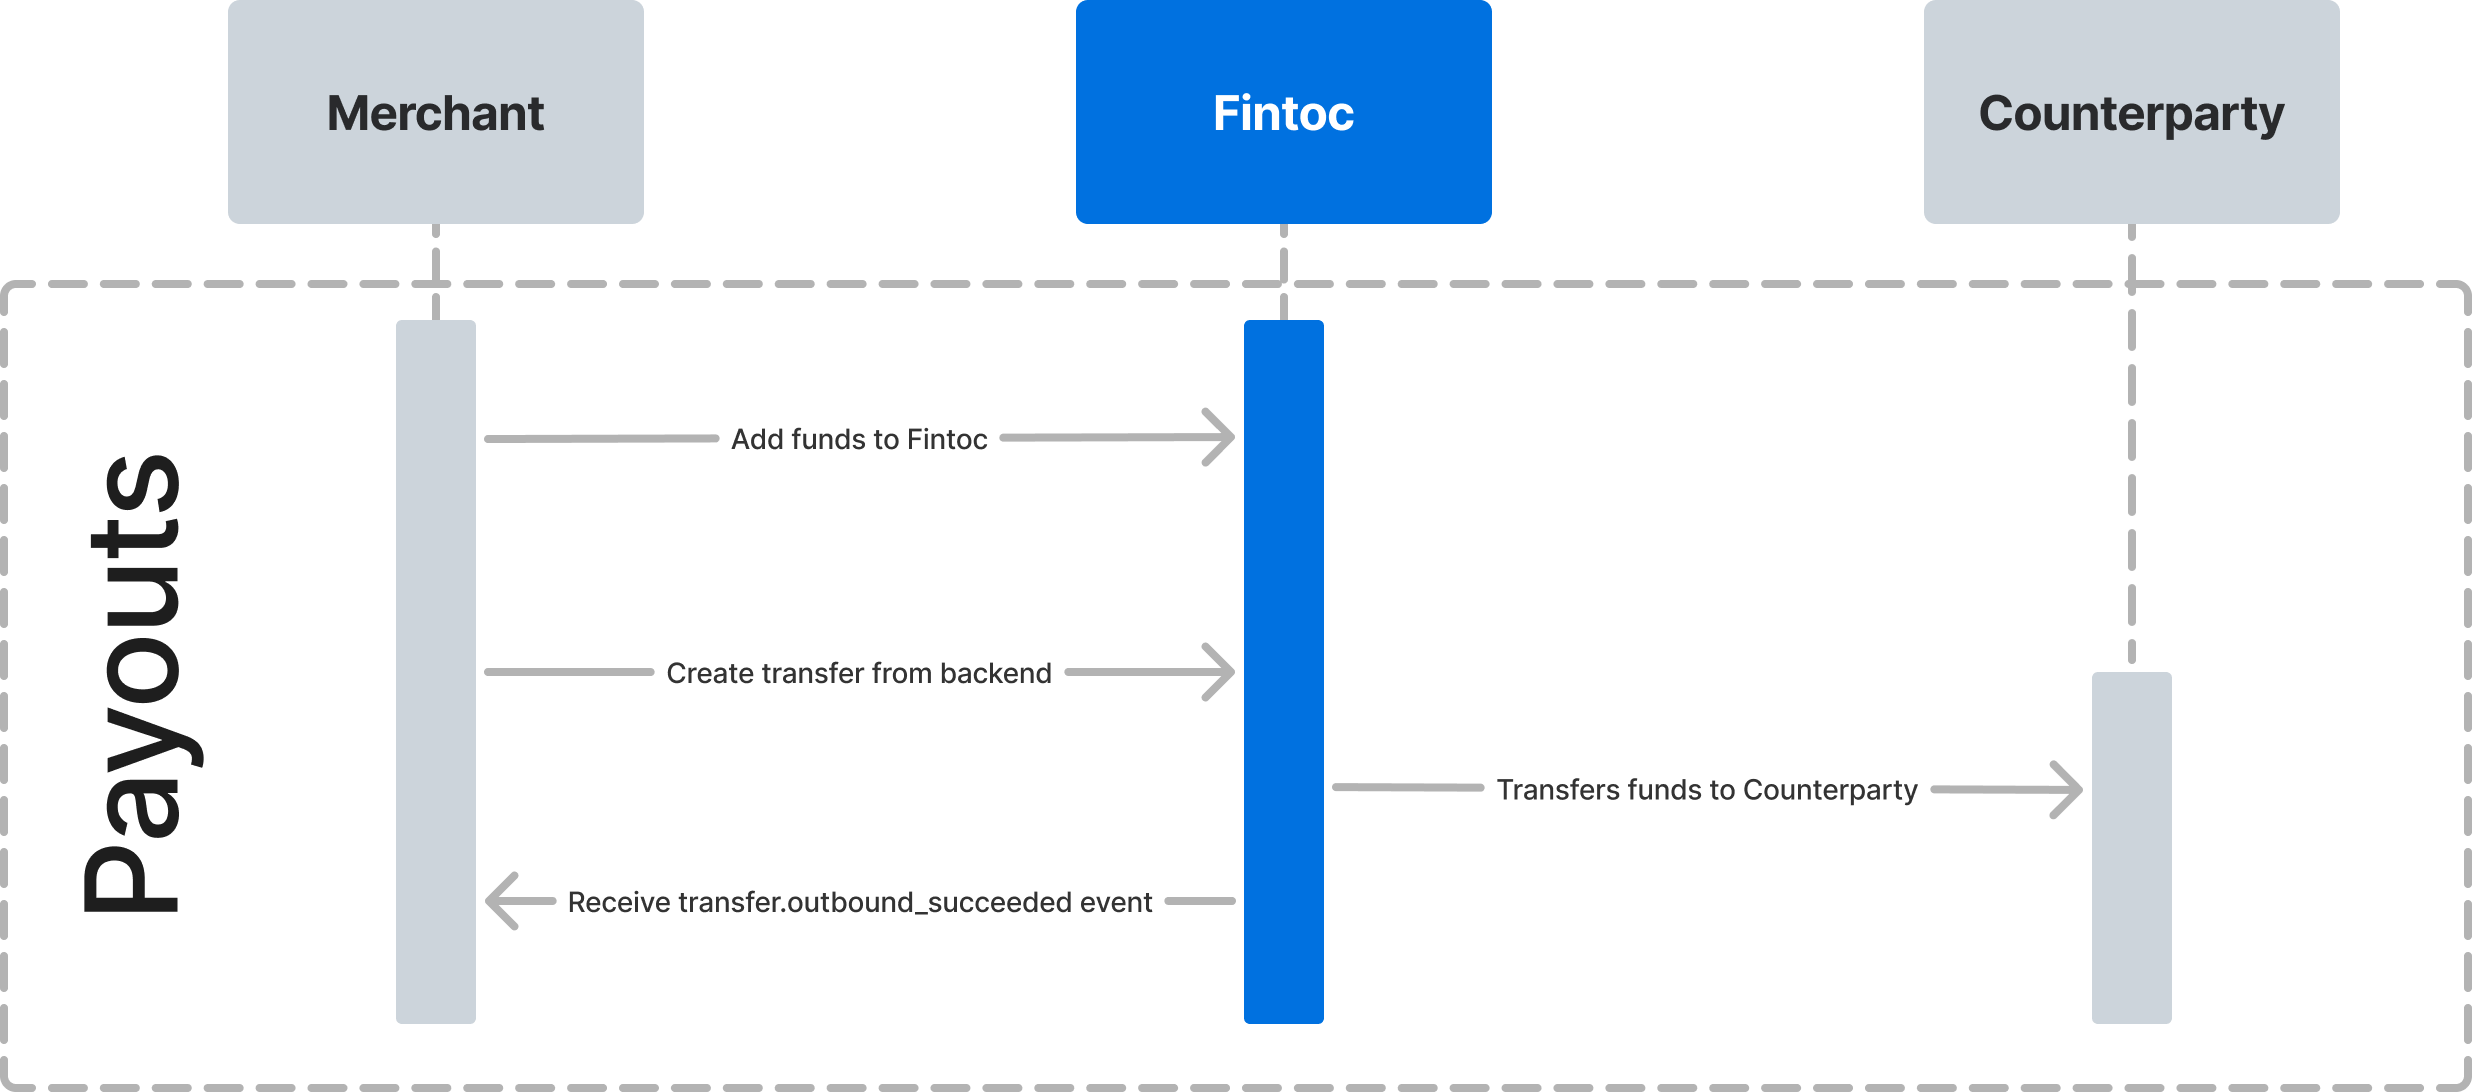
Step 1: Configure JWS signing keys and generate a JWS signature
Every request to a Fintoc Business Accounts API endpoint requires a JWS signature. JWS digitally signs data to verify its integrity and authenticity. To sign an API request, follow the JWS signature guide.Step 2: Add funds to Fintoc
Before creating transfers, deposit funds into yourAccount through its root_account_number. The deposit appears as an inbound transfer. To fund an account in live mode, see Fund your account.
Step 3: Create a transfer
After you add funds to your account, create a transfer from your backend. Include your test secret key, JWS signature, origin account, amount, currency, and counterparty. The following examples show successful transfer responses. To test other terminal outcomes, use the table in Test the integration.Use an idempotency key
Fintoc supports idempotency so you can retry transfers without creating duplicates. Use an idempotency key when creating a transfer. If a connection error occurs, retry the request with the same key. To make an idempotent request, include theIdempotency-Key header. See Idempotent requests for details.
Create a transfer for Mexico 🇲🇽
Here is an example that creates a transfer of $590.13 MXN. Theamount field is in the smallest currency unit, so $590.13 is the integer 59013. A successful request returns the created Transfer:
Add
institution_id for mobile numbers and debit cardsWhen transferring to a standardized Mexican bank account number (CLABE), you do not need institution_id. Fintoc determines the institution from the CLABE. For a mobile phone number or debit card, include the five-digit institution_id from the Banco de México institution list. Otherwise, the API returns a 400 Bad Request error.Counterparty object requires one attribute:
Create a transfer for Chile 🇨🇱
Here is an example that creates a transfer of $1,869 CLP. Because CLP has no minor unit, theamount field is the same integer, 1869. A successful request returns the created Transfer:
Counterparty object requires five attributes:
Large transfers in Chile
Some Chilean banks cap incoming transfers at $7,000,000 CLP. To send more, create one transfer for the full amount. Fintoc splits every outbound transfer over $7,000,000 CLP into parts of up to $7,000,000 CLP, whatever the counterparty’s bank, and sends each part to the counterparty.- You work with one transfer. The API returns a single
Transferwith the fullamount. Webhooks, the receipt, and the account movement all belong to that transfer. The parts do not appear in the API. - The counterparty receives one transfer per part. Every part is $7,000,000 CLP except the last, which can be smaller. For example, $15,000,000 CLP arrives as $7,000,000, $7,000,000, and $1,000,000 CLP.
- Each part’s comment names its position. Fintoc appends
X de Nto yourcommentso the counterparty can reconcile the parts. For example,Factura 1042becomesFactura 1042 2 de 3on the second of three parts. Without acomment, the part’s comment is only2 de 3. To keep each part’s comment within 40 characters, Fintoc truncates yourcommentto leave room for the suffix. A transfer split into 2 to 9 parts keeps the first 33 characters. Thecommenton theTransferstays as you sent it. - Your balance must cover the full amount. Fintoc holds the full
amountwhen you create the transfer. If your balance is lower, the request fails and Fintoc sends no parts. - Parts go out one after another. A split transfer stays
pendinglonger than a single transfer.
pending until every part finishes. A part can fail if, for example, the counterparty’s bank goes down while Fintoc is still sending the parts. When every part finishes, the transfer reaches one of these statuses:
Fintoc returns the amount of every part that does not settle to your available balance, and does not retry those parts. To send the rest of a
partially_succeeded transfer, create a new transfer for amount minus settled_amount.
To receive a notification when a split transfer reaches
partially_succeeded, subscribe your webhook endpoint to transfer.outbound.partially_succeeded.Step 4: Monitor transfer status
Transfer status flow
A transfer’s status is one ofpending, succeeded, failed, returned, return_pending, rejected, or reject_failed. Chilean transfers add partially_succeeded, reverse_pending, and reversed. For more details on transfer statuses, see the Transfer data model.
Monitor status using webhooks
Fintoc sends atransfer.outbound.succeeded event when the transfer settles. Use the webhook guide to receive these events. You can then notify your customer or log the transfer in your ERP.
Subscribe your webhook endpoint to these events and handle each one, including transfer.outbound.partially_succeeded if you send Chilean transfers over $7,000,000 CLP:
Test the integration
Use your test secret key (sk_test_...) to run transfers in test mode without moving real money. Every response sets mode to test.
In test mode, a transfer reaches the same terminal statuses as in production. Predefined inputs do not force an outcome. The outcome depends on how the receiving party resolves the transfer. Use these terminal statuses to confirm your webhook handling: