VTEX
Accept payments using Fintoc’s plugin in your VTEX store.
This guide will help you integrate Fintoc's payment plugin into your VTEX store. With this plugin, you can effortlessly process payments, enabling your customers to complete their purchases without leaving your VTEX store. Follow these steps to begin accepting payments and boosting your sales in just a matter of minutes.
Getting Started: Credentials and Setup
1. Sign Up
To initiate the process, head to Fintoc's dashboard and sign up. Once you've completed this step, you can start testing out payments using our Test mode. To start receiving payments in Live mode, reach out to your dedicated sales representative or contact us at [email protected] to facilitate account activation and provide you with the necessary credentials.
2. Obtain API Keys
Within your Fintoc dashboard, you will find both Test and Live API Keys. These keys are vital for configuring the plugin within your VTEX environment.
To get your Live API Keys, make sure you are in Live mode by checking the button on the bottom left of our dashboard. Then, head over to For Developers → API Keys to obtain them.
Integration and Configuration Process
Enabling the Plugin in Your VTEX Store
Follow these steps to activate Fintoc's plugin within your VTEX store:
- Log in to the VTEX admin platform using your credentials.
- From the side menu, select the Store Settings icon located at the bottom of the screen.
- Within the settings, navigate to PAYMENT: Providers.
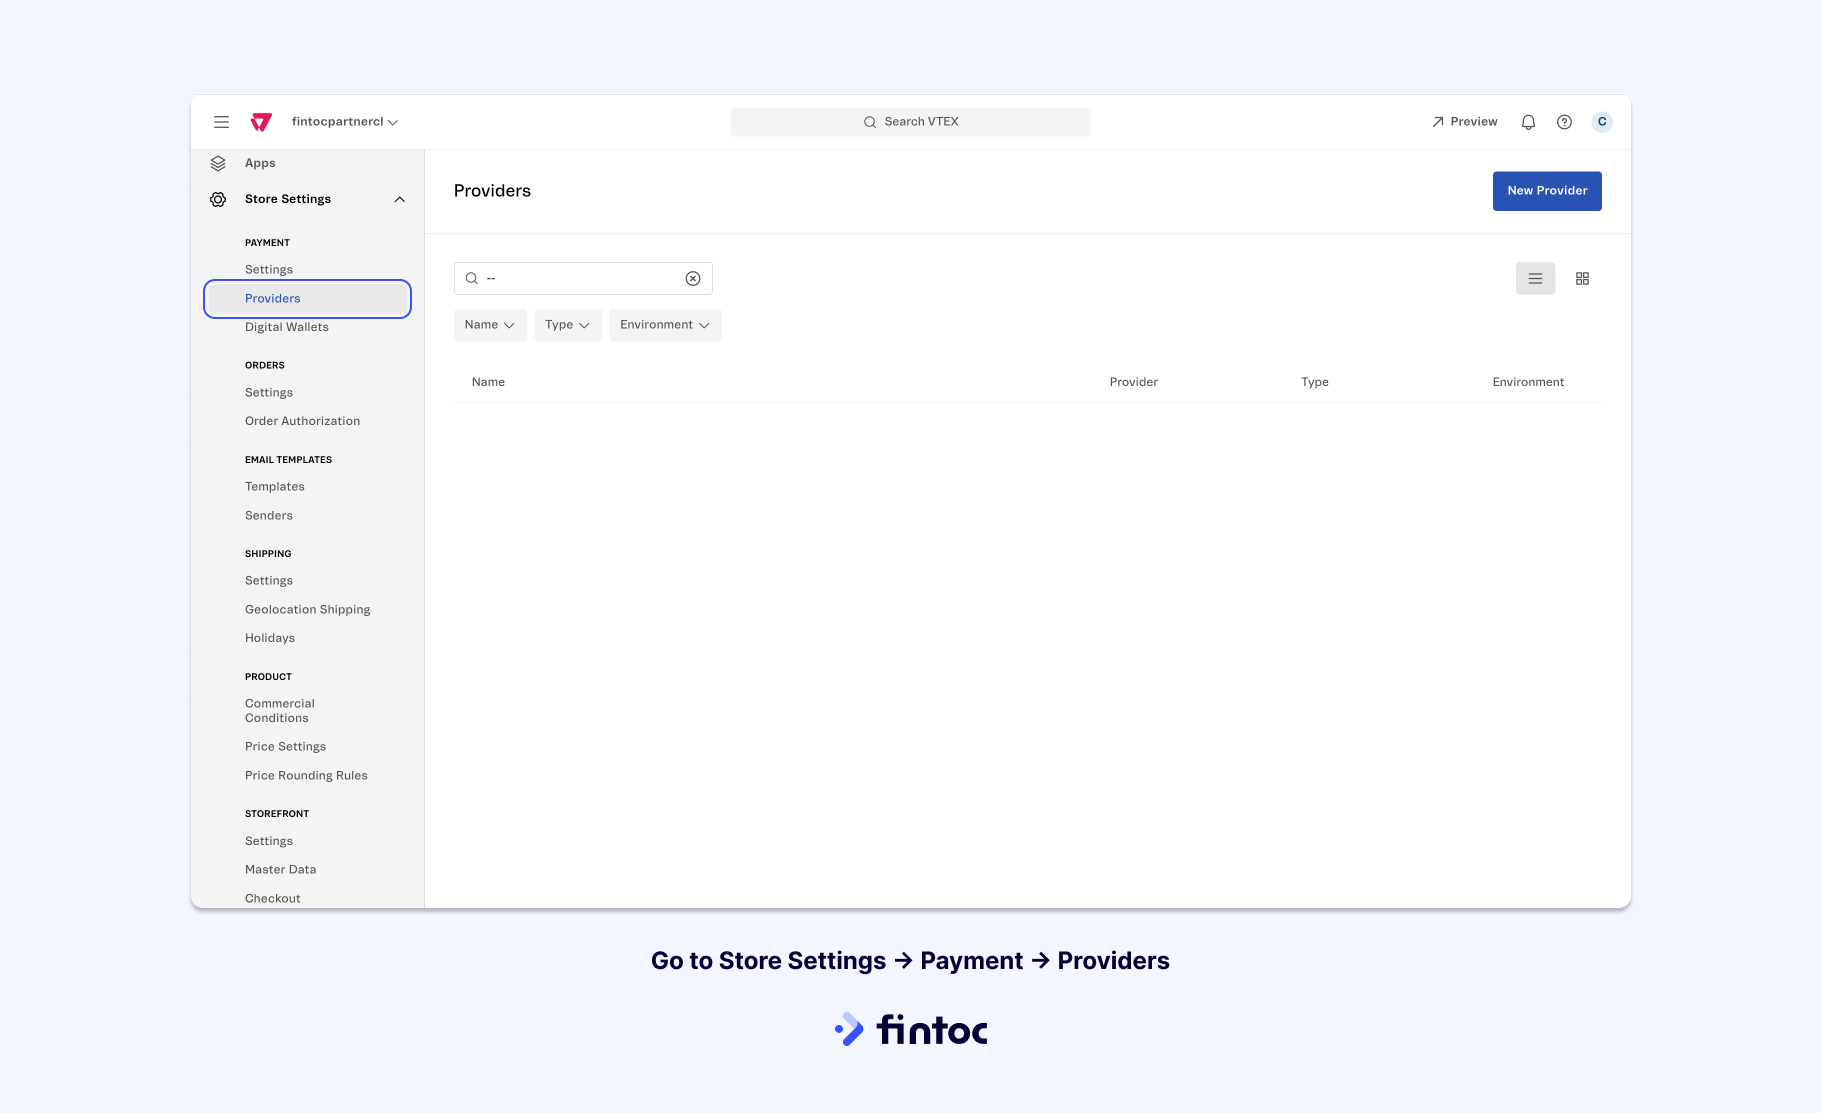
- Click on the "New Provider" button to add a new payment provider.
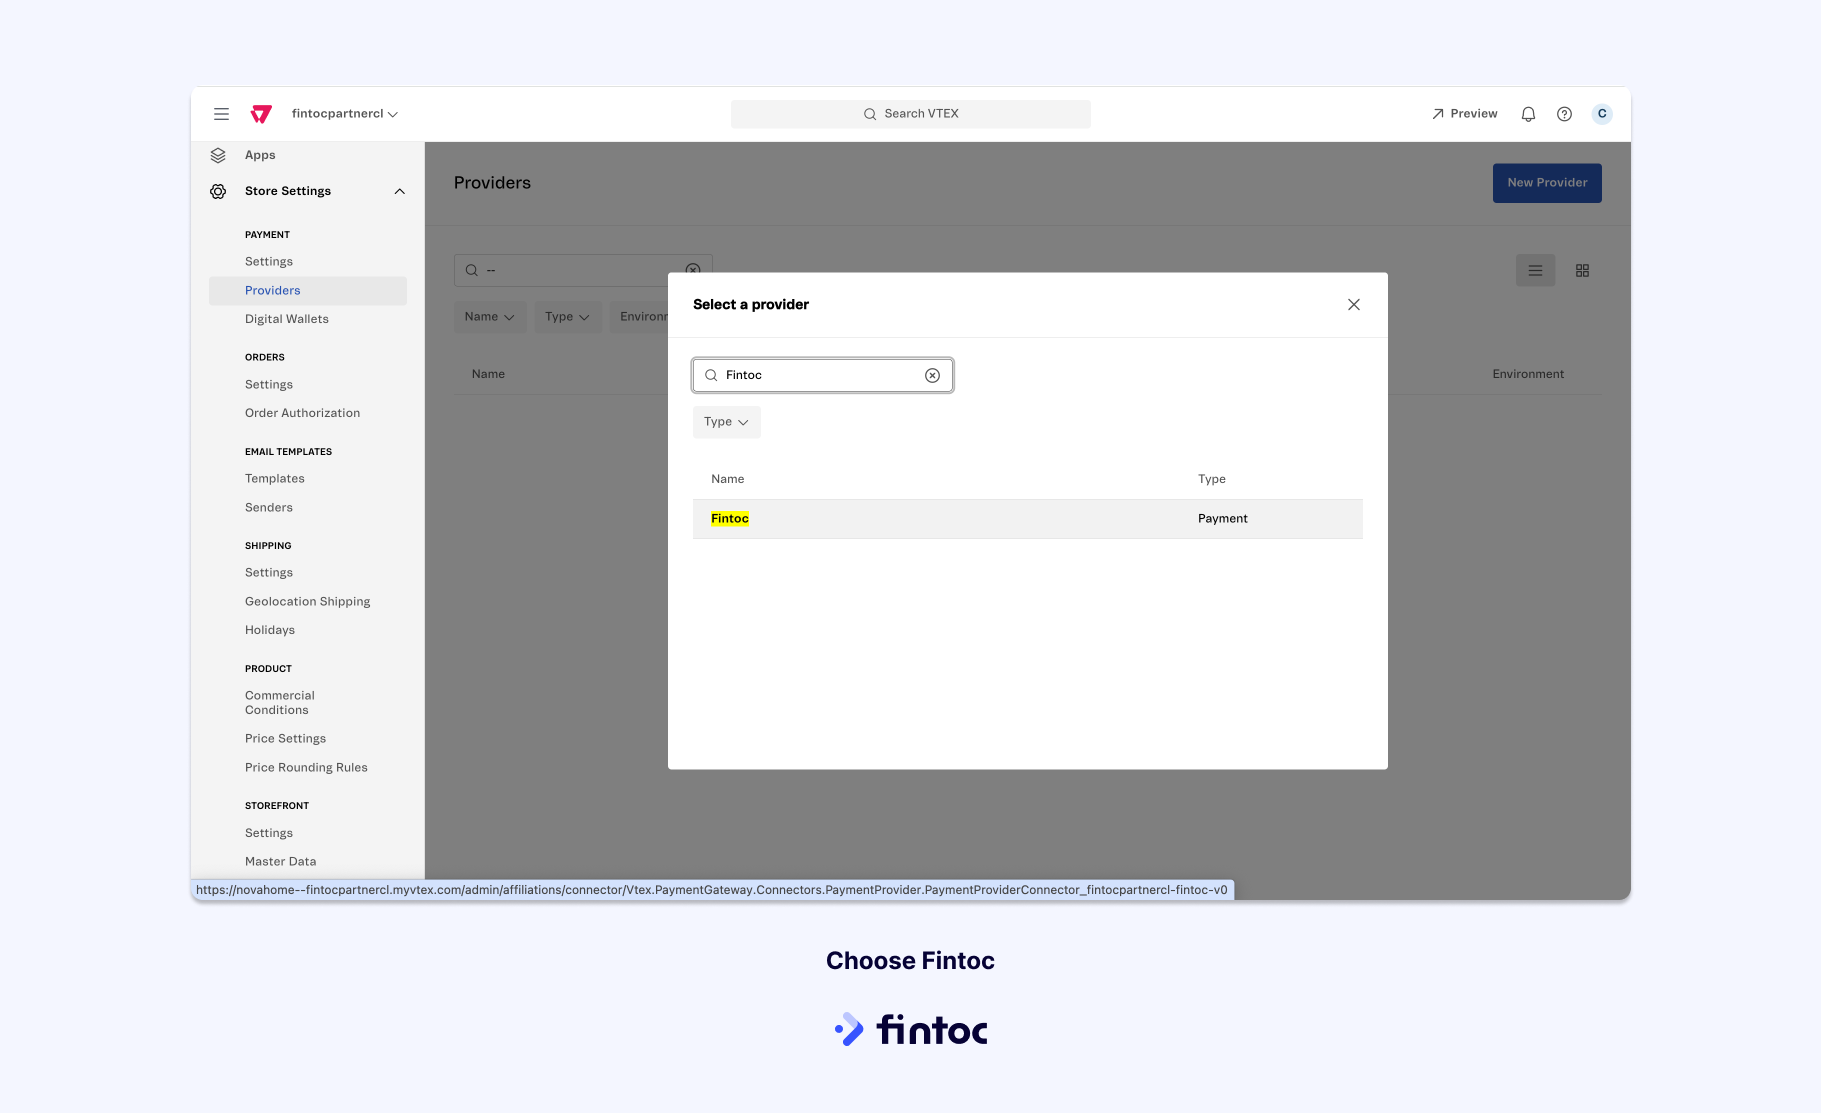
- Look for Fintoc and choose it from the list.
- Complete the Configuration options as follows:
- Enter your Live Mode Public Key, which can be located in your Fintoc dashboard, into the Application Key field.
- Similarly, insert your Live Mode Secret Key from your Fintoc dashboard into the Secret Key field.
- You can insert ********** into the Application Token field or leave it blank.

- To use Test mode, select the Enable test mode checkbox and enter your Test Mode API Keys
- When using Test mode, you can try out your integration following the instructions you can find here.
- Deactivate the Enable test mode checkbox and change your API Keys back to Live to switch to Live mode.
- Confirm your choices by clicking the Save button.
- Congratulations! Your VTEX store is now fully equipped to process payments via Fintoc.
Payment Configuration
Change Connector's Name
To improve conversion in your checkout, we highly suggest that you change our connector name to "Pay with your bank" ("Paga con tu banco"). This will let your users easily know how to use Fintoc to pay.
To do so, you can follow VTEX's guide on changing payment method names.
Decimal Inconsistencies
For those setting up a store in Chile, it's essential to make specific adjustments to avoid decimal-related inconsistencies in payments and reconciliations. Here's how to do it:
- Navigate to VTEX Store Settings.
- Select ORDERS: Settings.
- Within the General section, locate the Cart settings and adjust the Number of decimal digits to be considered to 0.
- Finalize the process by clicking the Save button.
Refunds for E-Commerce PluginsYou can issue refunds directly from your e-commerce platform (VTEX or Shopify), but due to how the plugins work, refunds requested from e-commerce plugin platforms cannot be cancelled from their dashboards.
If you issued a refund from one of these platforms and wish to cancel it, you can use our Cancel Refunds API endpoint or contact our support team, but please consider that the cancellation will not be reflected in your VTEX or Shopify Dashboard
Updated 2 months ago